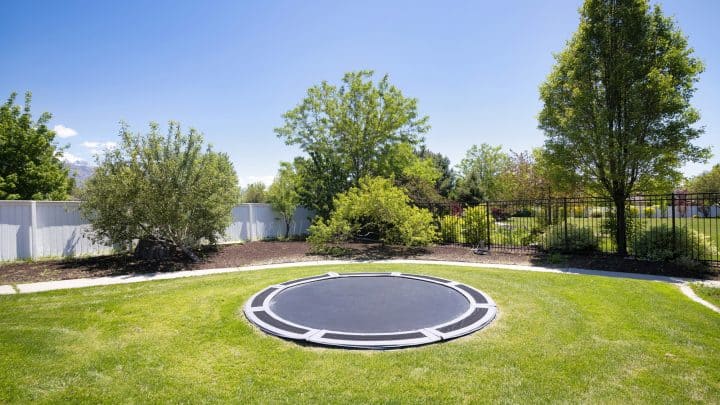
Trampolines are incredibly fun and can be a great way to relax and get some exercise in good weather. But, above-ground trampolines have a reputation for having safety problems, and if you accidentally miss the trampoline’s jumping area you often have several feet of extra height to fall down before you hit solid ground.
Generally, having an in-ground trampoline is a little safer (and cheaper), but it takes more prep work and installation to really get things going.
Here’s the step-by-step for what you need to know to install your own in-ground trampoline.
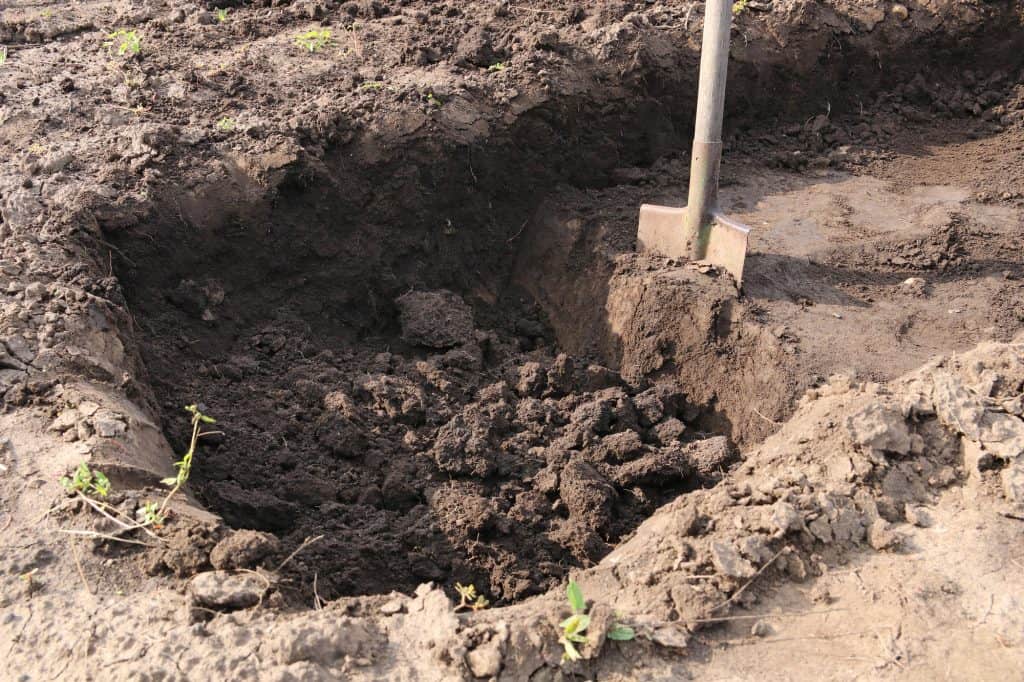
1. Excavating

Excavating the hole your trampoline is going in is one of the most important parts of this process. If you don’t excavate the right size and shape of the hole you’ll have extra steps later to modify and get the hole ready for the trampoline.
Digging The Base Hole
The base hole for an in-ground trampoline is the hole that supports the trampoline frame and keeps the trampoline steady while you’re using it. This hole is usually a little wider than the trampoline frame itself but isn’t as deep as the inner hole.
This is one of the most important parts of preparing the space for an in-ground trampoline. Get this wrong and you’ll need to modify it to fit your in-ground trampoline. Unlike an above-ground trampoline, which usually has enough support built into the frame for the whole trampoline, in-ground trampolines usually get some extra support from the surrounding ground of the trampoline hole.
First, lay out your trampoline frame to get a sense of how wide your in-ground trampoline is. Trace the outline onto the ground. Remember that you’ll want an extra few inches wider than the in-ground trampoline for installation. Once you’ve got the hole mark you’re ready for the entire hole.
However, don’t start digging until you know what the base hole and inner hole should look like.
The extra few inches wider in this hole are important for adding a retaining wall. While having a retaining wall is technically optional for most in-ground trampolines, we highly recommend using one during in-ground trampoline installation.
The next thing you need to know is how wide the base ledge needs to be between the base hole and the inner hole. This is the space where the trampoline needs to be steady and maintain even tension across the whole trampoline. So this part of the hole isn’t actually that deep, usually just deep enough for the trampoline legs.
Measure the legs on the frame, make sure there’s enough room for your retaining wall materials, and then go ahead and dig to the required depth.
Digging The Inner Hole
The inner hole of an in-ground trampoline is important. This trampoline hole is there to handle the stretch of the trampoline while you’re jumping. It’s critical to get this trampoline hole right because if it’s too shallow you can cause serious injuries when someone starts jumping.
In most cases none of the trampoline frame will be in this part of the wall, this is about making plenty of room for the trampoline mat to stretch.
The upper dimensions of the inner hole should be just as wide as the trampoline mat, not as wide as the trampoline frame. Remember, the base hole supports the trampoline frame, and the inner hole gives you the space you need to make the trampoline fun.
The entire hole, no matter whether you’re trampoline frame is circular or rectangular, should be a dome. This way it’s deep enough to manage the flex in the trampoline in the center and the sides, but it’s more stable than just making the whole hole as deep as the trampoline can flex in the middle.
Remember, trampolines flex less near the springs, and more in the very middle.
This is the critical part of ground trampoline installation, your in-ground trampoline needs enough room to be safe. It’s usually better to have an extra few inches of hole width and depth than you actually need. You can backfill with soil later, and that’s a lot easier than digging deeper in your hole.
So you need to figure out how much space your trampoline needs to flex. The trick is that different trampolines will flex more or less depending on the design and the weight limit, so you need to make sure your trampoline pit is designed for your specific trampoline.
Most brands will either list the size of trampoline hole you need for the entire trampoline on the box or in the assembly instructions or they’ll provide the hole measurement you need online.
Remember, a hole measurement is an estimate, and it’s usually a good idea to have a few-inch margin of error. Backfilling later can help keep the trampoline frame even and make sure you have enough space.
For round trampolines, your inner hole should be a bowl shape. Rectangular trampolines are a little different, the hole should still be a bowl shape, but more oval than circular.
How Deep Do You Dig?
Figuring out how deep to dig for your in-ground trampoline is a critical part of the process. In-ground trampolines are so much fun, but only if the whole underneath is deep enough.
Make sure you check the correct height before you dig the hole. Nothing about the inner hole will be quite right if you dig the wrong depth and then end up having to dig the hole deeper later on.
The exact depth do dig depends on the trampoline you purchased, so you’ll need to look up the proper depth in the instructions or on the company website. However, so most backyard trampolines, the depth of the inner hole will be slightly less than the total width of the trampoline.
Proper Drainage
If you’ve ever dug a hole in your garden only to have it fill in with water the next time it rains, you’ll understand why this step is important. Trampolines in rainy areas especially need some kind of drainage to help protect both the trampoline and the trampoline’s hole.
There are a few water drainage options for your in-ground trampoline. You can install a drainage pipe leading somewhere lower in your yard, which is the best long-term option for dealing with a lot of water but means more preparation and more excavation in the beginning.
A 4-inch pipe is usually more than enough to get proper drainage if you choose this method, but you also need to make sure there aren’t any unprotected gaps between the trampoline frame and the retaining wall or sides of the trampoline hole since leaves and other yard debris can clog your drain.
Alternatively, you can use a hand water pump to remove occasional water, or you can install an electric pump to help drain the standing water from the hole.
Both pump options are usually cheaper and easier to handle, but they might not be effective in wet climates where you’ll need to drain the hole under your in-ground trampoline more often.
2. Install The Retaining Wall (recommended)
The next step of in-ground trampoline installation is installing the retaining wall. Having a retaining wall helps prevent the hole from collapsing, and protects you and your trampoline from accidental backfilling as dirt and rock inside the hole weather and move over time.
There are lots of retaining wall options, from laying a stone retaining wall by hand, to using a concrete frame to make a concrete retaining wall. Some retaining wall kits will have one included (although this one does not).
Usually, the retaining wall is only necessary for the base hole, but you can go deeper and use it to provide additional stability to the bowl-shaped inner hole if you want to.
Retaining walls are less necessary if you’re building on naturally hard ground, but even then they can still give you extra peace of mind and help your new trampoline last a lot longer in your yard.
Many trampoline kits will have their own retaining wall as part of the package. If not, you’ll need to look into building a small one yourself.
3. Frame Assembly
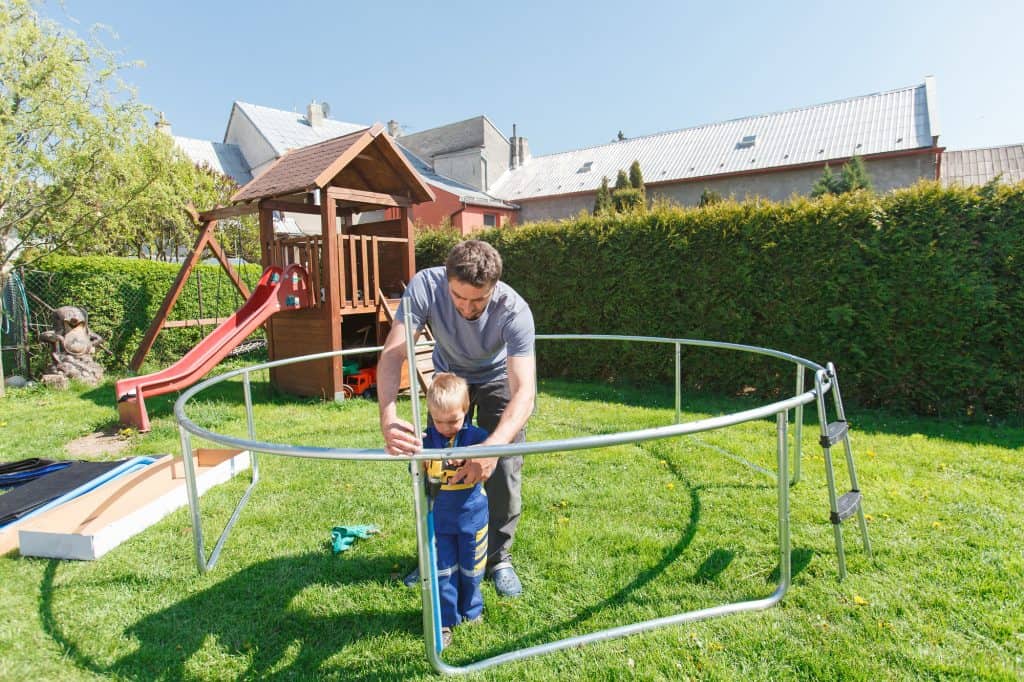
The next step after you’ve got the retaining wall built is the frame assembly. You should have frame assembly instructions provided with the trampoline, but it isn’t that difficult.
For an in-ground trampoline, you’ll need to attach the legs of the trampoline to the upper frame. Don’t attach the springs yet, that happens later.
An in-ground trampoline should also have its own retaining wall on the outside of the legs. Most of the time this retaining wall is made of sheet metal and pressure-treated wood to add stability. You’ll need a screwdriver and the included screws to attach everything.
There should be a hole mark on every attachment point. Don’t try to force parts together if they don’t attach smoothly. Make sure you’re attaching the right parts together before continuing and make sure the alignment is good. That should resolve any difficult parts of the assembly.
4. Frame Installation
Installing the frame in the trampoline hole should be simple, assuming you made a good hole mark at the beginning of this process.
Lift the frame into the hole, and use a level to check and make sure it’s sitting flat. If the frame isn’t level at the beginning, backfill slightly or use a piece of lumber to compress the soil inside the hole to help level it out.
Only once the frame is level in the ground can you move on to the next part of the project.
Some people also use cinder blocks at the bottom of the frame’s legs to help hold them down and hold them in place.
Lay the mat in the hole to make sure it’s going to fit inside.
Once the trampoline frame is in the ground it’s time to install the springs. Attach the springs first to the frame, and then attach the mat. You’ll want to start at the corners of a rectangular frame, or at four points equidistant around a circular trampoline frame and work from there. Next, attach the mat once enough springs are in place to support it, and then connect the remaining springs.
Adjust spring tension as you go. You need even tension for the trampoline to behave properly, so you may need to keep adjusting until you get even tension. If this is your first time installing a trampoline, don’t worry, this part can take a few tries.
Can You Simply Put A Normal Trampoline In The Ground?
While you can certainly put a normal trampoline in the ground, they are not designed to move and handle the stress in the same way as a regular trampoline. By putting an above-ground trampoline under the earth, there’s the chance it won’t be able to flex and move like it’s supposed to.
Using a regular trampoline like an inground trampoline is asking for accidents and can cause a lot more problems than it’s worth.
5. Finishing
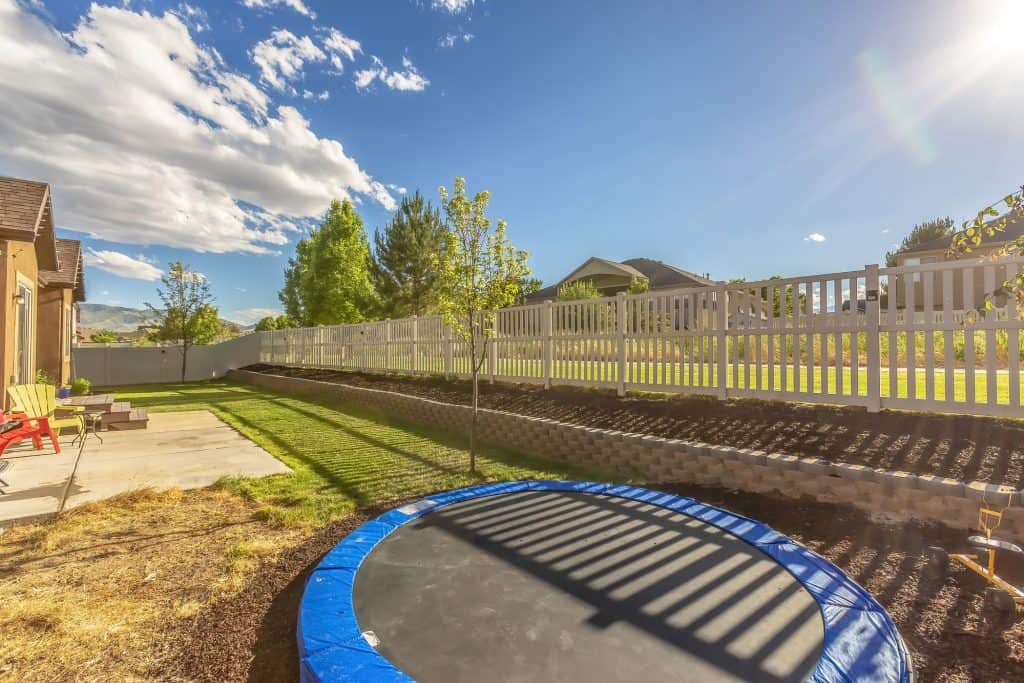
You’ve made it! The trampoline is in the ground, the springs are attached, you’ve got good drainage, and there’s a little extra space around the trampoline left to finish everything off. You’re officially in the home stretch!
Let’s talk about the last steps.
Back-Filling Soil
Ideally, you should have saved some of the excavated topsoil from digging the trampoline hole. Your trampoline should have shrunk a little when you attached the mat and springs, and you should have left some extra space around the outside, to begin with. The plan for this space was always to then backfill once the trampoline was assembled and ready to go.
Add the excavated topsoil evenly around the outside of the trampoline until it’s evened out and at ground level.
Some people leave a couple of inches of venting space here, but if you have vented pads you don’t need to.
Adding Trim
After the hole is back filled and level, the next step is adding trim. Trim isn’t included with all in-ground trampolines, but if you have a gap between the top of the trampoline and the ground, you can use trim to help disguise that gap and protect the ground inside from lawn and garden debris.
This is usually attached just to the outside frame with clips and may be weighted or nailed into the ground, depending on the design.
Install Safety Pads
At this stage, the vented pads finally attach over the springs. It’s important to make sure vented pads finally attach both to protect the springs and to protect jumpers, but also because if you attach them sooner they can get in the way of tension adjustments and get pinched in the springs, which you don’t want.
These safety pads also protect against any sharp edges on the frame or springs, and you may need to replace them occasionally over time.
Install Safety Net

This step is optional, and again, not all trampolines come with a safety net. Even though a safety net is more or less standard on an above-ground trampoline, in-ground trampolines are considered safe enough that not everyone uses them.
Still, if you have a separate safety net that you want to install around the trampoline for added safety, now is the time. Just make sure the base of the safety net doesn’t interfere with the function of the trampoline springs or the retaining wall.
Many trampoline kits will have this included (including this one).